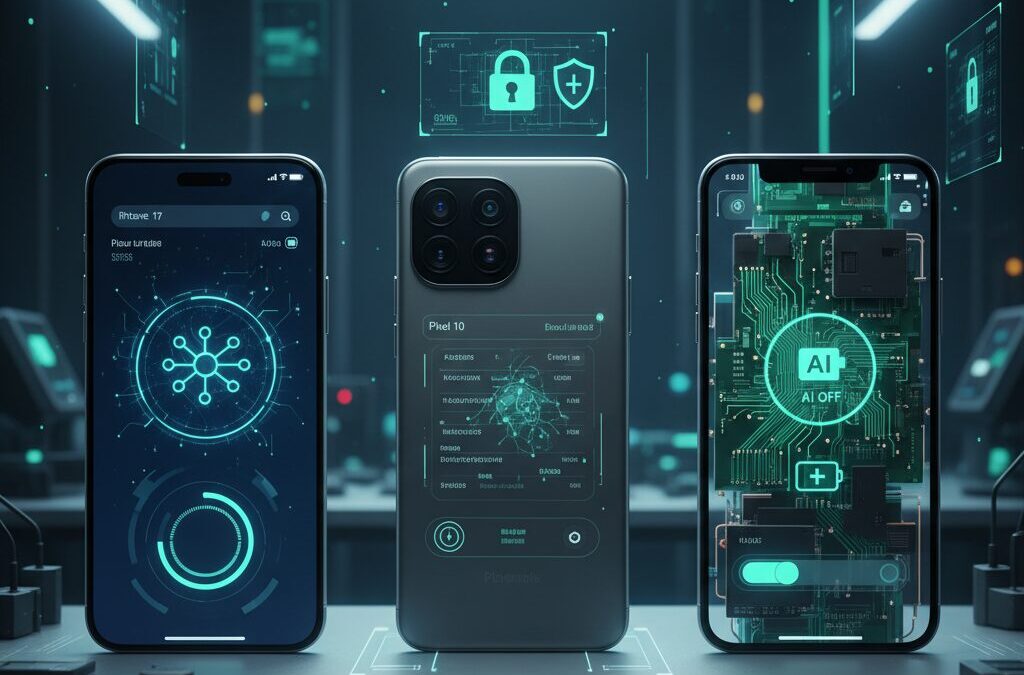
In 2026, setting up a new smartphone is no longer a simple activation process. Your iPhone 17 or Pixel 10 is a powerful AI-driven computer that continuously analyzes behavior, manages energy, and connects to financial and biometric systems. The default settings are designed for convenience and ecosystem expansion, not necessarily for maximum battery life, privacy, or performance.
If you care about refresh rate efficiency, AI governance, passkeys, intrusion logging, or eliminating carrier bloatware, the first 30 minutes with your device are critical. Small configuration changes can extend screen-on time by hours, reduce background AI exposure, and harden your phone against unauthorized access.
In this comprehensive 2026 optimization blueprint, you will learn how to control variable refresh rates, minimize Always-On Display drain, govern Apple Intelligence and Gemini, deploy Private Space and Passkeys, and safely remove unnecessary system apps. By the end, you will not just own your device—you will administrate it with precision.
- The 2026 Paradigm Shift: Why Initial Setup Now Determines Digital Sovereignty
- Variable Refresh Rate vs Battery Life: 60Hz, 120Hz, and Measurable Power Trade-Offs
- Native 60Hz vs Capped 60Hz: Why ProMotion Feels Different
- Always-On Display Power Cost: Real-World Standby Drain on Pixel 10 and iPhone 17
- Battery Longevity Science: 80% vs 95% Charging Limits and Electrochemical Stress
- Adaptive Power Control and On-Device AI: How Neural Engines Learn Your Usage
- Apple Intelligence Controls: Using Screen Time for Granular AI Restrictions
- Managing Gemini on Android 16: Permissions, Assistant Rollback, and Data Exposure
- Carrier Bloatware Removal with ADB: Safe Debloating Without Breaking Core Functions
- Emergency Alerts and SOS Configuration: Security Without False Triggers
- Passkeys and Credential Manager: Building a Phishing-Resistant Authentication Stack
- Android 16 Private Space: Creating a Fully Isolated Digital Environment
- Intrusion Logging in Android 16: Smartphone Forensics for Advanced Users
- Hardware-Level Optimization: Customizing iPhone 17 Camera Control
- Developer Options on Pixel 10: Animation Scaling and Real-Time Refresh Diagnostics
- 参考文献
The 2026 Paradigm Shift: Why Initial Setup Now Determines Digital Sovereignty
In 2026, initial smartphone setup is no longer a routine activation process. It is the moment when you either accept a vendor-defined digital life or consciously architect your own. With devices like iPhone 17, Pixel 10, and Android 16 deeply integrating on-device AI, biometric identity, and payment infrastructure, the first configuration screen now determines the boundaries of your digital sovereignty.
Modern smartphones function as extensions of your cognitive and financial identity. Apple Intelligence and Gemini operate at the OS layer, analyzing context, language, and behavioral signals. According to Apple’s published privacy framework, certain AI tasks are processed on-device while others may leverage secure cloud computation. Google similarly embeds Gemini at the system level in Android 16. Whether these systems are constrained, redirected, or fully enabled depends entirely on choices made during setup.
Digital sovereignty in 2026 means deciding who controls your data flows, battery resources, and AI execution rights—before the device learns your behavior.
Battery behavior offers a concrete example. Independent lab tests such as those reported by GSMArena show measurable differences in endurance when high refresh rate modes are enabled. User reports on Pixel and iPhone communities consistently indicate 15–20% higher consumption under sustained 120Hz usage compared to 60Hz conditions. If you enable adaptive display features without understanding their impact, you are effectively delegating energy policy to the manufacturer.
| Initial Choice | Long-Term Impact | Sovereignty Implication |
|---|---|---|
| Enable 120Hz Adaptive | Higher GPU wake cycles | Performance prioritized over endurance |
| Activate Always-On Display | ~1–1.5% standby drain per hour (community tests) | Ambient visibility over energy control |
| AI Assistant Default On | System-wide context access | Data visibility expanded |
| Carrier Apps Retained | Background services active | Ecosystem lock-in reinforced |
Security architecture further amplifies the stakes. Android 16 introduces features such as Private Space and Intrusion Logging, designed to isolate apps and record tampering attempts. However, these protections are not meaningful unless activated and configured correctly at the beginning. Similarly, Apple’s Screen Time restrictions allow granular control over AI extensions, but only if the user deliberately enables those limits.
What changed in 2026 is not merely feature complexity. It is the structural shift from device ownership to system governance. Default settings increasingly optimize for ecosystem engagement, AI utilization, and service integration. They do not automatically optimize for minimal data exposure or maximal battery longevity.
Leading security researchers have long argued that defaults shape behavior more powerfully than user intent. In the context of smartphones that store biometric identifiers, financial credentials, and behavioral histories, the cost of passive acceptance compounds over years of usage.
Initial setup has therefore become a constitutional moment for your device. You are defining jurisdiction: which processes run locally, which permissions persist, which services gain contextual awareness. Once machine learning models adapt to your habits, reversing those patterns becomes more difficult.
In 2026, digital sovereignty is not declared when you buy the hardware. It is established in the first hour of configuration.
If you approach setup strategically—questioning defaults, constraining AI reach, calibrating display behavior, and auditing preinstalled services—you transform the smartphone from a vendor-optimized consumption node into a user-governed computing platform. That shift marks the true paradigm change of this era.
Variable Refresh Rate vs Battery Life: 60Hz, 120Hz, and Measurable Power Trade-Offs
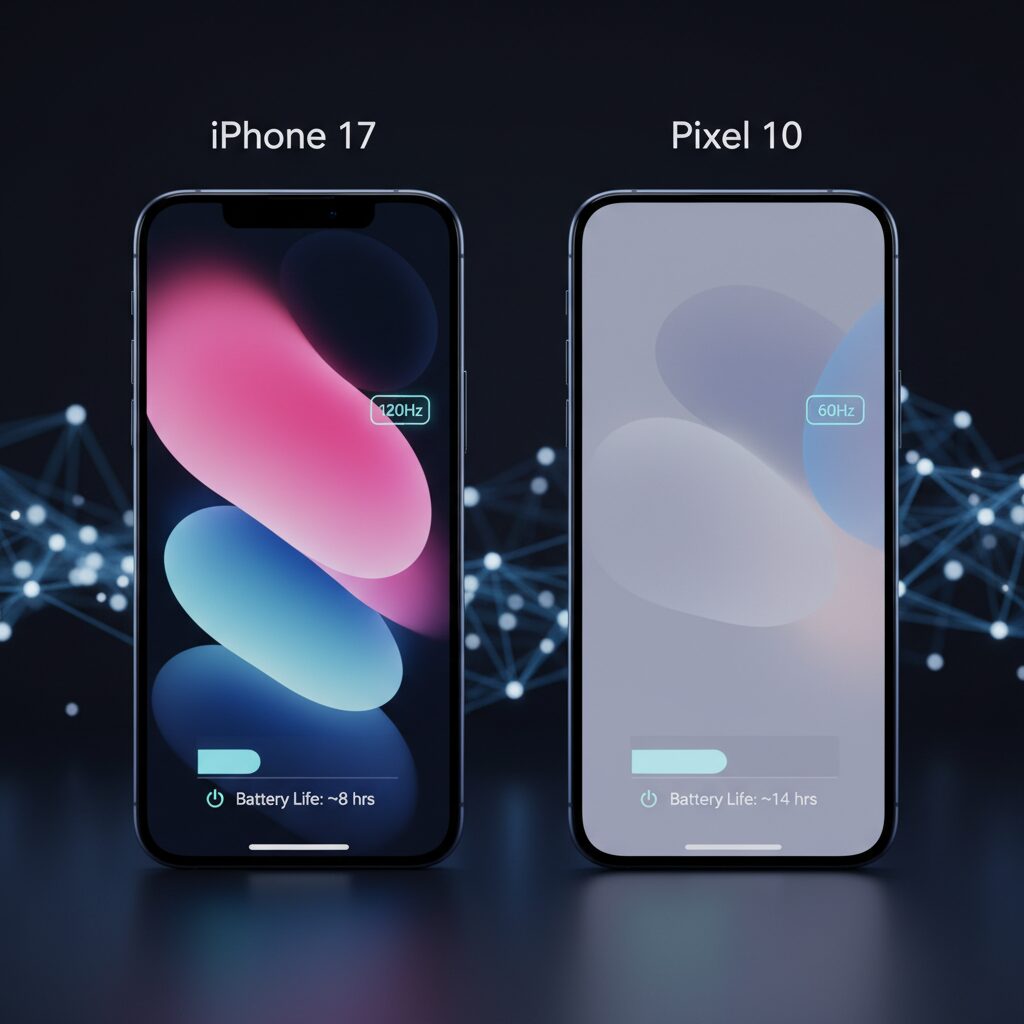
Variable refresh rate (VRR) displays promise the best of both worlds: ultra-smooth 120Hz when you scroll, and ultra-low 1Hz when the screen is idle. However, in real-world usage, higher refresh rates still translate into measurable battery trade-offs.
On flagship devices such as Pixel 10 and iPhone 17 Pro, the gap between 60Hz and 120Hz is not theoretical. It is quantifiable under common workloads like web browsing, social media scrolling, and messaging.
| Mode | Typical Use Case | Relative Power Impact |
|---|---|---|
| 60Hz (Fixed) | Static content, reading | Baseline |
| 120Hz (Adaptive) | Scrolling, animations | +15–20% consumption |
According to laboratory testing by GSMArena and corroborated by user reports from the Pixel community, enabling Smooth Display at 120Hz on Pixel 10 results in approximately 15% to 20% higher battery drain during mixed-use scenarios compared to locking the device at 60Hz.
This increase is not caused by panel refresh alone. The GPU must render twice as many frames per second, the display driver IC remains more active, and higher touch sampling rates trigger more frequent CPU wake-ups. Each layer compounds the energy cost.
On iPhone 17 Pro, Apple’s ProMotion dynamically scales between 1Hz and 120Hz. Idle efficiency is excellent thanks to LTPO technology. However, when actively scrolling or navigating system animations, power draw still rises measurably.
Community testing documented on Reddit shows that forcing 60Hz via Low Power Mode or accessibility settings can extend daily screen-on time by several hours in some usage patterns. While anecdotal, the consistency of reports suggests a statistically meaningful effect.
An interesting engineering nuance emerges when comparing “native 60Hz” panels with “120Hz panels capped at 60Hz.” Users frequently report that capped 120Hz devices feel slightly less natural.
The reason lies in frame pacing. A native 60Hz display refreshes at a constant 16.6ms interval. In contrast, a capped VRR system still runs its dynamic algorithm, introducing minor timing jitter. Human vision is sensitive to irregular frame intervals, which can be perceived as subtle stutter.
Context matters. The power delta becomes more pronounced outdoors, where high brightness amplifies display consumption. In bright sunlight, combining 120Hz with maximum luminance can significantly accelerate battery depletion.
Conversely, during stationary reading or video playback at 24–60fps, the benefit of 120Hz is minimal. In such cases, forcing 60Hz eliminates unnecessary GPU cycles without degrading perceived smoothness.
Ultimately, VRR reduces waste compared to fixed 120Hz panels of the past, but it does not eliminate the physics of energy consumption. Higher refresh rates increase computational workload, and workload consumes power. Advanced users should treat refresh rate as an adjustable performance dial, not a cosmetic toggle.
Native 60Hz vs Capped 60Hz: Why ProMotion Feels Different
At first glance, 60Hz is 60Hz. If you cap a 120Hz ProMotion display to 60Hz, it should look identical to a native 60Hz panel. However, many users report that it does not feel the same. According to discussions across Reddit threads focused on iPhone Pro models, users frequently describe capped 60Hz as “slightly jittery” or “less natural” compared to older native 60Hz iPhones.
The difference is not psychological. It is rooted in how refresh timing is generated at the hardware and software levels.
| Aspect | Native 60Hz Panel | 120Hz Panel Capped to 60Hz |
|---|---|---|
| Refresh timing | Fixed 16.6ms interval | Dynamic, algorithm-controlled |
| VRR behavior | None (static) | Still active within upper limit |
| Frame pacing | Consistent cadence | Potential micro-variations |
A native 60Hz display refreshes every 16.6 milliseconds with hardware-level consistency. The cadence is predictable and uniform. There is no variable refresh logic attempting to optimize power or responsiveness. This mechanical regularity is precisely why scrolling feels stable, even if it is not ultra-smooth.
By contrast, a ProMotion display is built around Variable Refresh Rate (VRR). Even when you impose a 60Hz ceiling via Low Power Mode or accessibility settings, the system continues dynamically adjusting refresh behavior based on content. The cap limits the maximum, but it does not convert the panel into a true fixed 60Hz device.
This distinction affects frame pacing, not just frame rate.
Frame pacing refers to the consistency of intervals between rendered frames. Minor fluctuations—often imperceptible in raw numbers—can be detected by the human visual system as micro-stutter. Display research cited in developer discussions shows that humans are particularly sensitive to irregular timing, sometimes more than to absolute frame count.
In practical use, this becomes noticeable during slow scrolling or UI transitions. On a native 60Hz device, motion progresses with metronomic consistency. On a capped ProMotion device, the system may briefly dip below 60Hz when content is deemed static, then ramp back up. Even if the average remains 60Hz, these tiny oscillations introduce subtle jitter.
Interestingly, this is the inverse of what happens at 120Hz. When ProMotion operates freely between 1Hz and 120Hz, the high ceiling masks timing inconsistencies because the frame budget is generous. At 60Hz, the margin for error is halved. Small scheduling deviations become proportionally more visible.
Community battery tests and user reports also suggest that capped 60Hz does not always deliver identical efficiency to a native 60Hz panel. Because the LTPO controller and touch sampling system remain optimized for high responsiveness, the display stack may still wake components more frequently than a simpler fixed panel would. The result is that you may save power compared to full 120Hz, but the visual feel changes without fully replicating the behavior of a true 60Hz device.
Native 60Hz is a hardware identity. Capped 60Hz is a software constraint layered on top of a high-frequency architecture.
For enthusiasts optimizing battery life, this nuance matters. If your goal is maximum endurance with predictable motion cadence, a device engineered around fixed 60Hz will feel inherently coherent. If you are using a ProMotion device, understand that limiting the ceiling alters performance characteristics but does not fundamentally rewire the timing engine underneath.
The takeaway is not that one is objectively better. It is that display smoothness is not defined by a single number. It is defined by timing stability, VRR behavior, and system-level scheduling precision working together. That is why ProMotion capped at 60Hz feels different—even when the spec sheet says otherwise.
Always-On Display Power Cost: Real-World Standby Drain on Pixel 10 and iPhone 17

Always-On Display (AOD) looks minimal, but its power impact is anything but negligible. Even with LTPO panels capable of dropping to 1Hz and OLED pixels that shut off when black, the system must keep parts of the display driver, touch controller, and notification pipeline awake.
Real-world user reports for Pixel 10 Pro on Reddit indicate that standby drain increases by roughly 1% to 1.5% per hour with AOD enabled. Over a full 24-hour cycle, that translates to 24% to 36% theoretical battery usage if the device remains mostly idle.
This does not mean your phone will always lose a third of its battery overnight, but it clearly shows that AOD is one of the largest controllable contributors to standby drain on modern flagships.
| Device | AOD Status | Estimated Standby Drain |
|---|---|---|
| Pixel 10 Pro | AOD On | ~1–1.5% per hour |
| Pixel 10 Pro | AOD Off | Significantly lower, workload-dependent |
| iPhone 17 Pro | AOD On (with wallpaper) | Higher pixel activation, increased drain |
| iPhone 17 Pro | AOD On (black background) | Reduced OLED power draw |
Google appears to recognize this trade-off. According to code analysis reported by PhoneArena, Android 16 is testing a feature that disables AOD when user inactivity is detected. This system-level intervention is critical because traditional scheduling alone cannot detect edge cases such as a phone left face-up on a desk for hours.
On Pixel 10, enabling inactivity-based AOD suspension can meaningfully cut passive drain, especially overnight. Combined with Bedtime Mode, which can fully disable ambient display and background recognition features, the reduction becomes measurable rather than marginal.
On iPhone 17 Pro, the design philosophy differs. Apple allows wallpaper rendering even in AOD mode, which keeps more pixels partially lit. While aesthetically refined, this increases pixel activation ratio. Turning off wallpaper in the Always-On settings shifts the display closer to a near-black information layer.
Because OLED power scales with the number of illuminated pixels, black-dominant layouts materially improve standby efficiency. This principle is well documented in display engineering research and reflected in practical battery measurements across OLED devices.
Another overlooked factor is notification frequency. Each incoming alert briefly wakes additional display and processing components. Heavy messaging users may experience higher effective drain than light users, even with identical AOD settings.
For enthusiasts who track overnight battery deltas, the difference between AOD on and off can mean waking up at 88% instead of 96%. Over weeks, that delta compounds into more frequent charging cycles, which indirectly affects long-term battery health.
In short, Always-On Display is not “free,” even in the LTPO era. Strategic configuration—disabling wallpaper on iPhone 17 or enabling inactivity detection on Pixel 10—transforms AOD from a silent battery tax into a controlled, predictable feature.
Battery Longevity Science: 80% vs 95% Charging Limits and Electrochemical Stress
When we debate 80% versus 95% charging limits, we are really debating voltage stress and time spent at high state of charge. Lithium‑ion batteries age fastest when they remain near their maximum voltage, where parasitic reactions accelerate inside the cell.
According to widely accepted electrochemical research referenced by battery universities and academic journals, high voltage increases electrolyte oxidation and thickens the SEI layer on the anode. This irreversible growth consumes active lithium and reduces total capacity over time.
The key variable is not just how high you charge, but how long the battery stays there.
| Charge Limit | Voltage Stress Level | Longevity Impact |
|---|---|---|
| 100% | Maximum | Fastest chemical aging |
| 95% | High but reduced peak | Moderate stress reduction |
| 80% | Significantly lower | Substantially slower degradation |
At 100%, the cathode operates at its highest potential. Even a small reduction to 95% slightly lowers peak voltage, which measurably reduces oxidative stress. While the numerical gap seems minor, electrochemical reaction rates increase non‑linearly near the upper voltage boundary.
However, the difference between 95% and 80% is more dramatic. Dropping to 80% meaningfully reduces average cell voltage, cutting cumulative stress during daily charging cycles. This is why many long‑term battery tests show noticeably improved capacity retention when upper limits are capped around 70–80%.
There is also a thermal dimension. High state of charge combined with elevated temperature accelerates degradation exponentially. If you leave your device plugged in overnight at 100%, especially under a pillow or in a warm room, chemical aging compounds further.
In contrast, stopping at 95% can act as a pragmatic compromise. You preserve most of your daily runtime while avoiding prolonged trickle charging at peak voltage. From a stress‑time integral perspective, that alone reduces cumulative wear compared to a constant 100% hold.
For power users who upgrade annually, 95% may be rational. For users aiming at three to four years of ownership, 80% meaningfully shifts the degradation curve.
Another often overlooked factor is depth of discharge. Cycling between 30% and 80% creates shallower charge cycles than 0% to 100%. Electrochemical studies consistently show that shallow cycles extend total cycle life compared to full swings.
Ultimately, battery longevity is governed by three stressors: high voltage, deep discharge, and heat. Charging limits primarily address the first variable. By strategically selecting 80% or 95% based on your usage model, you are actively reshaping the chemical aging trajectory of your device rather than passively accepting factory defaults.
In practical terms, this is not about chasing perfection. It is about reducing time spent at the extreme edges of the voltage window, where lithium‑ion chemistry is least stable and most vulnerable to irreversible change.
The science is clear: lowering the ceiling lowers the stress. The only question is how much convenience you are willing to trade for long‑term electrochemical health.
Adaptive Power Control and On-Device AI: How Neural Engines Learn Your Usage
Adaptive power control marks a clear shift from rule-based battery saving to behavior-driven optimization. Instead of simply lowering CPU clocks or dimming the display when a threshold is reached, modern devices such as iPhone 17 and Pixel 10 continuously analyze how, when, and why you use your phone. The result is a system that adapts in real time, guided by on-device AI rather than static presets.
At the core of this evolution is the Neural Engine on Apple silicon and the AI accelerators embedded in Google’s latest Tensor platform. These dedicated blocks process usage patterns locally, without sending raw behavioral data to the cloud. According to Apple’s privacy documentation, on-device processing is prioritized whenever possible, which means optimization decisions are computed directly on your handset.
The key difference is this: traditional power saving reacts to battery level, while adaptive control predicts your next move.
For example, if the system learns that you stream video every evening between 21:00 and 23:00, it can proactively reserve thermal and power headroom for sustained GPU workloads. During low-interaction hours—such as mid-morning message checks—it may bias tasks toward efficiency cores, delay non-urgent background indexing, and batch network calls to reduce radio wake-ups.
Unlike coarse “Low Power Mode,” this orchestration operates at multiple layers of the stack.
| Layer | AI-Driven Adjustment | User Impact |
|---|---|---|
| CPU Scheduling | Dynamic shift between performance and efficiency cores | Smoother peaks, lower idle drain |
| App Activity | Deferred background refresh based on habit modeling | Reduced standby consumption |
| Charging Logic | Usage-aware top-off timing | Less high-voltage dwell time |
Charging behavior is particularly interesting. Building on optimized charging limits such as 80% or 95%, the AI observes your unplugging routine. If you typically disconnect at 7:30 a.m., the system can hold the battery at a lower state overnight and complete the final percentage just before that time. This reduces prolonged exposure to peak voltage, which battery research consistently associates with accelerated chemical aging.
Google’s Android adaptive battery framework follows a similar philosophy. By ranking apps according to usage frequency, it restricts background execution for rarely opened services. Developer documentation for Android highlights how standby buckets limit CPU and network access for infrequently used apps, directly cutting parasitic drain.
Crucially, these models improve with stable behavioral input. In the first week after setup, erratic experimentation can confuse prediction engines. Consistent real-world usage allows the neural subsystem to construct a reliable activity graph, improving task prefetching accuracy and reducing unnecessary wake cycles.
For power users, the strategic takeaway is clear. Adaptive systems reward pattern stability and punish randomness. If you want maximum efficiency, allow the device to learn your genuine daily rhythm instead of constantly toggling modes. On-device AI is no longer just about photography or voice assistants—it is silently managing electrons, one prediction at a time.
Apple Intelligence Controls: Using Screen Time for Granular AI Restrictions
Apple Intelligence is deeply integrated into iOS 19 on iPhone 17, powering Writing Tools, image generation, and enhanced Siri experiences. While Apple emphasizes privacy through on-device processing and its Private Cloud Compute architecture, some users prefer tighter control over when and how these AI capabilities operate. In that case, Screen Time becomes your most powerful governance tool.
Rather than disabling Apple Intelligence entirely, you can apply granular, feature-level restrictions. Apple’s official support documentation explains that specific AI functions can be blocked individually through Screen Time, allowing you to retain core usability while restricting data-sensitive extensions.
Where to Configure AI Restrictions
| Path | Purpose |
|---|---|
| Settings → Screen Time | Activate usage controls |
| Content & Privacy Restrictions | Enable policy enforcement |
| Intelligence & Siri | Toggle AI features individually |
Once inside “Intelligence & Siri,” you can selectively disable Writing Tools, Image Playground, and external AI integrations such as the ChatGPT extension. This method is significantly more precise than a global toggle.
For privacy-focused users, blocking the ChatGPT extension is particularly critical. According to Apple’s feature documentation, certain complex Siri queries may be handed off to external models when permitted. By switching this off, you effectively prevent outbound data flow beyond Apple’s controlled infrastructure.
Writing Tools control is equally strategic. When enabled, text entered in Mail, Notes, or third-party apps may be analyzed for summarization or rewriting. Disabling this ensures that sensitive drafts—legal text, confidential reports, unreleased product discussions—remain outside generative processing layers.
Another advanced tactic is combining Screen Time restrictions with a separate Screen Time passcode. This transforms AI access into a permission-gated layer. In enterprise or family environments, administrators can prevent reactivation without authorization, creating a practical AI governance boundary.
From a digital sovereignty perspective, this approach aligns with modern data-minimization principles advocated by major privacy frameworks. Limiting processing pathways reduces exposure surfaces without sacrificing device performance.
Importantly, these restrictions are reversible and do not degrade system stability. Unlike uninstalling system components, Screen Time toggles operate within Apple’s supported configuration model, ensuring update compatibility.
For power users, the optimal strategy is selective containment: keep on-device intelligence that enhances productivity, disable cloud-relay extensions, and protect high-sensitivity workflows. This balanced configuration allows you to enjoy Apple Intelligence while maintaining authoritative control over how far it reaches into your data.
Managing Gemini on Android 16: Permissions, Assistant Rollback, and Data Exposure
On Android 16, Gemini is no longer just an optional AI layer. In many cases, it replaces the traditional Google Assistant by default and operates with deeper system integration. For power users, this raises a critical question: how much visibility and control does Gemini actually have over your device?
According to guidance highlighted by security-focused outlets such as Proton and advanced Android communities, Gemini can request access to screen content, communication logs, and contextual app data to deliver its “screen-aware” assistance. This elevated privilege model makes permission management non-negotiable.
Key Control Points in Android 16
| Area | Setting Path | Risk if Enabled |
|---|---|---|
| Default Assistant | Settings > Google > All services > Search, Assistant & Voice > Gemini | Full contextual AI replacement |
| Screen Access | Settings > Apps > Gemini > Permissions | On-screen data parsing |
| Communication Logs | Settings > Apps > Gemini > Permissions | SMS and call metadata exposure |
If you prefer a less intrusive setup, Android 16 still allows you to roll back the digital assistant. By navigating to the Gemini settings panel, you can switch back to the legacy Google Assistant or disable assistant functionality entirely. This rollback is especially relevant for users who prioritize predictable behavior over generative AI experimentation.
Importantly, even if Gemini remains active, you are not forced to grant blanket access. Android’s granular permission architecture means you can selectively revoke “Screen content reading,” SMS, or Call History permissions. This containment strategy preserves core assistant features while cutting off sensitive data channels.
Security analysts have noted that AI assistants derive contextual intelligence from exactly this layer of access. While Google positions Gemini as an on-device and privacy-conscious system, the operational reality is that broader permissions expand the potential data surface. For users handling confidential work documents or sensitive financial apps, restricting screen-level access is a rational defensive measure.
Another subtle vector is historical activity integration. If Gemini is linked tightly with your Google account activity controls, search history and app usage patterns can shape AI responses. Reviewing “Web & App Activity” inside your Google Account dashboard adds an additional governance layer beyond device-level permissions.
Ultimately, managing Gemini on Android 16 is not about disabling innovation. It is about shifting from passive acceptance to active administration. You decide whether Gemini operates as a full-context AI observer or a tightly sandboxed utility. That distinction defines the boundary between convenience and controlled exposure.
Carrier Bloatware Removal with ADB: Safe Debloating Without Breaking Core Functions
Carrier-branded Android devices in Japan still ship with a substantial amount of preinstalled applications tied to telecom ecosystems. These apps often run background services, consume storage, and maintain persistent network connections. According to security researchers and technical guides such as Kaspersky’s analysis of Android bloatware behavior, even disabled system apps may retain certain permissions unless explicitly uninstalled for the user profile.
For power users, ADB-based debloating remains the most precise and reversible method. The key is not aggressive deletion, but controlled, user-level removal that preserves core telephony, FeliCa, and emergency alert functionality.
ADB (Android Debug Bridge) allows you to uninstall packages only for the primary user (user 0) without rooting the device. The command commonly used is:
adb shell pm uninstall -k –user 0 package.name
This does not delete the system APK from the system partition. Instead, it detaches the app from your active user profile. If instability occurs, restoration is immediate using:
cmd package install-existing package.name
This reversibility is why ADB is significantly safer than flashing modified firmware or using root-based removal tools.
| App Category | Removal Risk | Potential Impact |
|---|---|---|
| Carrier Portal / News Apps | Low | No impact on core functions |
| Point / Shopping Ecosystem Apps | Low–Medium | Loss of reward integration |
| Carrier ID / Account Services | High | FeliCa, email, billing failures |
| Provisioning / SIM Services | Critical | Network instability |
Particular caution is required for apps linked to d Account, au ID, or SoftBank authentication layers. These often interface with FeliCa secure elements or carrier billing APIs. Removing them blindly can break mobile payments or prevent OTA configuration updates.
GitHub community package lists for specific models, such as Galaxy carrier variants, demonstrate that safe debloating depends on device firmware version. A package removable on Android 14 may become dependency-linked on Android 16.
Before executing any uninstall command, you should:
First, list installed packages using adb shell pm list packages and document targets.
Second, disable the app from Settings to observe side effects for 24–48 hours.
Third, remove only non-essential user-facing services.
From a performance standpoint, users often report measurable improvements in standby drain and background CPU wakeups after eliminating telemetry-heavy carrier apps. While exact percentages vary, community measurements frequently show reduced background data traffic and fewer persistent notifications.
Safe debloating is therefore not about stripping the system bare. It is about reclaiming system resources while preserving Japan-specific essentials such as ETWS alerts and Osaifu-Keitai. With disciplined package auditing and reversible ADB commands, you maintain administrative control without compromising device integrity.
Emergency Alerts and SOS Configuration: Security Without False Triggers
Emergency features are no longer optional utilities. On iPhone 17, Pixel 10, and Android 16 devices, they are deeply integrated system-level services that can override silent mode, transmit location data, and automatically contact authorities. The challenge for power users is clear: maximize real-world safety while minimizing false triggers and accidental calls.
According to Google’s official Android Help documentation, Emergency SOS and wireless emergency alerts are designed to bypass user-configured sound profiles. That behavior is intentional. However, improper configuration often leads to unintended emergency calls, especially when hardware buttons are pressed inside a pocket or bag.
Emergency SOS Trigger Logic and Risk Mitigation
| Platform | Default Trigger | Risk Vector | Recommended Adjustment |
|---|---|---|---|
| iPhone 17 | Side button 5 presses | Accidental pocket activation | Enable countdown with alert sound |
| Pixel 10 / Android 16 | Power button 5 presses | Unintended auto-dial | Disable auto-call or extend countdown |
On Android 16, navigate to Settings > Safety & Emergency > Emergency SOS. You can disable automatic calling while retaining the emergency information screen. This preserves rapid access to medical data without initiating a false dispatch.
On iPhone 17, under Settings > Emergency SOS, activating the countdown sound is strongly recommended. The audible alert acts as a last-second fail-safe, allowing cancellation before the call is placed. Advanced users who rarely rely on hardware shortcuts may choose to disable the 5-press trigger entirely.
Wireless Emergency Alerts: Precision Over Noise
Wireless alerts such as earthquake warnings and national emergency broadcasts use special message classes that override Do Not Disturb. Google’s documentation confirms that certain alerts may sound at maximum volume depending on regional regulation.
Instead of disabling alerts wholesale, refine categories. Android 16 consolidates these under Settings > Safety & Emergency > Wireless Emergency Alerts. Critical alerts (e.g., earthquake, tsunami) should remain enabled. Test alerts and non-critical advisories can be toggled off to reduce alert fatigue.
iOS provides similar granularity under Notifications > Emergency Alerts. Ensure that government alerts remain active while evaluating optional regional notices based on your environment.
Medical ID and Location Transparency
Emergency systems increasingly transmit location data automatically. Both Apple and Google state that location sharing may activate temporarily during an emergency call to assist responders. Review this behavior in advance so it aligns with your privacy expectations.
Maintain an updated Medical ID (iOS) or Emergency Information profile (Android). These are accessible from the lock screen without unlocking the device. The key principle is selective exposure: include allergies, critical conditions, and emergency contacts—but avoid unnecessary personal data.
Security is not about enabling every feature—it is about calibrating friction. A properly tuned configuration ensures that genuine emergencies trigger decisive action, while daily handling never results in accidental escalation. This balance defines a mature digital safety posture in 2026.
Passkeys and Credential Manager: Building a Phishing-Resistant Authentication Stack
Passwords are the weakest link in modern mobile security. Phishing kits, credential stuffing, and database leaks continue to succeed because shared secrets can be copied and replayed. Passkeys fundamentally change this equation by eliminating the password itself. Instead of something you know, authentication is based on a cryptographic key pair stored securely on your device.
According to the FIDO Alliance and Google for Developers, passkeys rely on public‑key cryptography: the private key never leaves your device, while the public key is registered with the service. Even if a phishing site tricks you into visiting a fake domain, the cryptographic challenge will fail because the key is bound to the legitimate origin.
| Factor | Password | Passkey |
|---|---|---|
| Shared secret | Yes | No |
| Phishing resistance | Low | High (origin-bound) |
| Data breach impact | Reusable elsewhere | Not reusable |
On Android 16, Credential Manager acts as the unified control plane for passwords, passkeys, and federated logins. Google’s official documentation explains that apps integrate with a single API, allowing users to choose the strongest available credential without fragmented prompts. This architectural consolidation reduces downgrade attacks where users fall back to weaker methods.
From a setup perspective, you should navigate to Passwords & Accounts and enable Google Password Manager as the default provider. When a supported service such as Google, Amazon, or Nintendo Account offers a passkey, registering it takes only biometric confirmation. The biometric check unlocks the private key locally; it does not transmit your fingerprint or face data.
For users operating both iPhone and Android devices, ecosystem fragmentation is a real operational risk. iCloud Keychain and Google Password Manager do not natively sync passkeys across platforms. The practical solution is to designate a cross‑platform manager such as 1Password or Bitwarden as the autofill service. As noted in Android’s supported environments documentation, third‑party managers can store and synchronize passkeys securely, enabling true multi‑device continuity.
Building a phishing‑resistant stack therefore means more than “turning on passkeys.” It requires three deliberate steps: prioritizing passkey registration wherever available, standardizing on a single credential provider across devices, and disabling legacy password fallbacks when services allow it. Each removed password is one less exploitable asset in breach markets.
When combined with on‑device secure elements and biometric gating, Credential Manager transforms the smartphone into a hardware-backed identity vault. Instead of memorizing secrets, you curate keys. Instead of reacting to breaches, you architect resistance. That shift—from password management to cryptographic identity management—is the foundation of a truly phishing‑resistant authentication stack.
Android 16 Private Space: Creating a Fully Isolated Digital Environment
Android 16 introduces Private Space as a native, OS-level isolation environment designed to separate sensitive apps and data from your primary profile.
Unlike traditional app locks or third-party vaults, Private Space operates as a logically independent user container within the system architecture.
According to Android Help and the Android Open Source Project documentation, apps installed inside Private Space are sandboxed with distinct storage, process visibility, and notification boundaries.
| Feature | Main Profile | Private Space |
|---|---|---|
| App Visibility | Visible in launcher | Hidden when locked |
| Notifications | Displayed normally | Suppressed when space is locked |
| Google Account | Primary account | Separate account supported |
| Storage Access | Shared within profile | Isolated app storage |
The most important distinction is that apps inside Private Space are effectively invisible to the main environment when locked. They do not appear in search results, recent apps, or share sheets.
This behavior is fundamentally different from simple icon hiding, which only obscures UI elements while keeping background services active.
Here, the isolation extends to process separation and storage scoping at the OS level.
One of the most powerful capabilities is the ability to bind a completely separate Google account to Private Space.
As confirmed in official Android guidance and vendor documentation such as ASUS ZenTalk, users can log into a secondary identity exclusively within this environment.
This enables a clean partition between digital personas—for example, separating financial operations, research activity, or sensitive communications from everyday browsing.
Consider a practical scenario for high-risk applications.
Banking apps, encrypted messaging platforms, or investigative research tools can reside inside Private Space, while social media and entertainment remain in the main profile.
If the device is casually accessed by someone else, the protected environment remains undiscoverable without authentication.
From a security architecture perspective, Private Space resembles a lightweight secondary user profile but is optimized for rapid locking and unlocking.
Because Android implements application sandboxing per user ID, apps in Private Space cannot directly read data from apps in the main space.
This reduces lateral movement risk in the event of malicious app compromise.
Equally important is behavioral containment.
Search history, YouTube recommendations, location logs, and AI interaction signals tied to the secondary Google account remain segregated.
This separation becomes strategically valuable in an era where on-device AI such as Gemini aggregates contextual data across services.
Activation is performed through system settings under security or privacy controls, where you define a separate lock method and configure which apps reside inside.
When locked, the system suspends visibility and access pathways, reinforcing both privacy and operational compartmentalization.
For users who view smartphones as extensions of their professional and personal sovereignty, Private Space represents a decisive shift toward granular digital self-governance.
Intrusion Logging in Android 16: Smartphone Forensics for Advanced Users
Android 16 introduces Intrusion Logging, a security layer designed to record critical system events in a tamper‑resistant format. For advanced users, this feature transforms a smartphone from a black box into a verifiable evidence source.
Unlike conventional security logs that can be cleared or altered by malware with elevated privileges, Intrusion Logging stores encrypted records that are protected against local modification. As reported by Techloy and other early analyses of Android 16, the logs are end‑to‑end encrypted and structured to prevent even the service provider from casually inspecting user data.
What Intrusion Logging Records
| Event Category | Examples | Forensic Value |
|---|---|---|
| Authentication | Lockscreen unlock attempts | Detect brute-force or unauthorized access |
| Application Changes | App installs or removals | Identify spyware or stalkerware injection |
| Network Activity | New outbound connections | Trace suspicious data exfiltration |
This structured approach aligns with principles seen in enterprise endpoint detection systems. By recording authentication, installation, and network events, Android 16 effectively brings elements of enterprise forensics to consumer devices.
The key innovation lies in log integrity. Because the records are cryptographically protected and isolated from normal user-space processes, malicious apps cannot simply erase their traces. This addresses a long-standing weakness in mobile incident response, where attackers often remove evidence before detection.
Real-World Use Cases
For journalists, researchers, and activists who face targeted attacks, Intrusion Logging provides a verifiable timeline of device interaction. If spyware is suspected, users can review whether unknown apps were installed or whether repeated unlock attempts occurred outside normal usage patterns.
Even mainstream users benefit. In cases of device theft, the log may reveal post-theft activity such as network reconnections or failed authentication attempts. According to coverage discussing Android 16’s rollout, this feature was designed specifically to clarify “what exactly happened” after a compromise.
Activation is handled within the security settings under device protection. Advanced users should enable it immediately after initial setup, ensuring that any anomaly from day one is recorded.
For those practicing digital sovereignty, this feature represents more than a checkbox. It is a democratization of forensic capability, placing investigative-grade telemetry into the hands of individuals. In a landscape where mobile devices store financial credentials, private communications, and biometric identifiers, having an immutable activity trail is not excessive—it is rational risk management.
Android 16’s Intrusion Logging does not prevent every attack. However, it ensures that if an intrusion occurs, it leaves fingerprints. For power users who demand transparency and accountability from their devices, that alone makes it one of the most consequential security additions in recent Android history.
Hardware-Level Optimization: Customizing iPhone 17 Camera Control
The pressure-sensitive Camera Control button on iPhone 17 is not just a shortcut. With hardware-level tuning, it becomes a precision input device that rivals dedicated camera shutters. However, in its default state, many users experience accidental presses or inconsistent response. Fine-tuning at the system level dramatically changes that experience.
According to Apple Support documentation, Camera Control sensitivity and click speed can be adjusted under Accessibility settings. This is not merely cosmetic customization. It directly alters the force threshold required to register input, effectively modifying the hardware interaction profile.
Properly calibrated pressure thresholds reduce false activations while preserving rapid launch speed—this is the key to transforming Camera Control from a gimmick into a professional tool.
Within Settings > Accessibility > Camera Control, you can modify click pressure and double-click speed. Increasing the pressure requirement is particularly useful for users who carry their device in tight pockets, where unintended half-presses often trigger the camera.
| Adjustment | Effect on Hardware Behavior | Best For |
|---|---|---|
| Lighter Press | Lower actuation force threshold | Quick street photography |
| Firmer Press | Higher resistance, fewer false triggers | Pocket carry, active movement |
| Slower Double-Click | Longer recognition window | Gloved or cold-hand use |
Another critical optimization is enabling AE/AF Lock via Camera Control. When activated, a half-press locks exposure and focus before full actuation captures the image. This mirrors DSLR ergonomics and fundamentally changes shooting consistency in high-contrast environments.
From an imaging workflow perspective, this reduces recomposition error. By locking exposure first, you prevent iOS from recalculating brightness mid-frame—especially useful during backlit portraits or neon-lit night scenes.
Function reassignment is equally powerful. Under Settings > Camera > Camera Control, the button can launch alternative apps such as QR code scanning or third-party professional camera software. CNET testing noted that many users began appreciating the hardware only after customizing its behavior to fit their shooting habits.
This flexibility means the button operates at the firmware-interaction layer rather than being hard-coded to Apple’s default camera app. That architectural decision reflects a broader design philosophy: hardware inputs should be context-aware and user-defined.
For advanced users, the optimal configuration often follows this logic: firmer press resistance, AE/AF Lock enabled, and assignment to the primary imaging app used daily. This minimizes friction while preserving intentional control.
When tuned correctly, Camera Control shifts from reactive tap-based photography to deliberate pressure-based capture. That subtle transition fundamentally elevates shooting precision on iPhone 17.
Developer Options on Pixel 10: Animation Scaling and Real-Time Refresh Diagnostics
For power users, Developer Options on Pixel 10 are not a hidden playground but a precision tuning panel. By adjusting animation scaling and monitoring real-time refresh rate behavior, you can directly influence perceived speed and battery efficiency without installing a single third-party tool.
According to long-running Android documentation and community benchmarks, animation duration has a measurable impact on perceived latency. The key is understanding that you are not increasing CPU performance—you are reducing visual delay.
Animation Scale Optimization
| Setting | Default | Recommended | Effect |
|---|---|---|---|
| Window animation scale | 1x | 0.5x | Faster app opening visuals |
| Transition animation scale | 1x | 0.5x | Snappier screen changes |
| Animator duration scale | 1x | 0.5x | Reduced UI motion delay |
After enabling Developer Options by tapping the build number seven times, reducing these three parameters to 0.5x shortens animation playback time by half. The result is a device that feels dramatically quicker, particularly when multitasking or navigating deep settings layers.
This does not increase processing power—it removes artificial waiting time built into UI transitions. For users sensitive to motion lag, this single adjustment can make Pixel 10 feel like a higher performance tier device.
Setting animation to 0x (off) is technically possible, but many users report that eliminating animations entirely makes the interface feel abrupt and less intuitive. A 0.5x configuration preserves visual continuity while enhancing responsiveness.
Real-Time Refresh Rate Diagnostics
Pixel 10’s LTPO panel dynamically shifts between low and high refresh rates depending on content. However, adaptive behavior is invisible unless you surface it.
Within Developer Options, enabling “Show refresh rate” overlays a live Hz counter on screen. This transforms your device into a diagnostic instrument.
Why does this matter? Independent lab tests such as those published by GSMArena demonstrate that higher refresh operation can increase battery consumption by approximately 15–20% during scrolling-heavy workloads. If your panel remains at 120Hz while reading static content, adaptive scaling may not be working as expected.
With real-time monitoring, you can confirm whether the display drops toward low-Hz states when idle and ramps up only during interaction. This is especially useful when evaluating third-party launchers, browsers, or accessibility overlays that may unintentionally lock the display at higher refresh states.
For advanced users troubleshooting unexplained battery drain, pairing refresh rate visualization with animation scaling adjustments provides actionable insight. If smoother animations are paired with excessive high-Hz persistence, battery impact becomes predictable rather than mysterious.
Developer Options on Pixel 10 therefore serve two strategic roles: perceived performance acceleration and empirical validation of adaptive display behavior. Used correctly, they allow you to balance fluidity and efficiency with measurable feedback instead of guesswork.
参考文献
- GSMArena:Google Pixel 10 review: Lab tests – display, battery life & charging speed
- PhoneArena:Google tests battery saving new feature for the Pixel’s Always-on display
- Apple Support:Block access to Apple Intelligence features in Screen Time on iPhone
- Gadget Hacks:Yes, your Android phone let Gemini slip in. Here’s how to take back control!
- Google for Developers:Passkey support on Android and Chrome
- Android Help:Hide sensitive apps with private space
- Techloy:Android 16’s New Intrusion Logging Feature: What It Is and How to Enable It
- Apple Support:Use the Camera Control on iPhone